
Showing posts with label Transfer-Eze. Show all posts
Showing posts with label Transfer-Eze. Show all posts
Saturday, October 9, 2010
Halloween - Stitching the Wheel - Work in Progress
OK, 3 blogs in one day is outrageous, I know! I've been under a lot of stress this weekend and so have been stitching a lot. Plus I like to take breaks between doing homework by embroidering. It takes longer, but I retain my sanity. 5 homework posts due yesterday. 5. Aaaaack! Here is the future Halloween decoration for my house. I'm slightly farther along than this. You can see the Transfer-eze stuck to the fabric. Design by Urban Threads.


Fall Failures and Successes: Fall Triple Moon
Well, I tried the Goddess design, upper left on the paper (previous blog post) on an organza bag, but the bag was too small and ripped, so that didn't work out very well. I had to toss the whole thing. :(
I used Transfer-eze to transfer the small triple moon design onto orange printed fabric. That turned out nicely. I think I'll frame it! :) That was also part of the Fall/Halloween art challenge on Creative Souls, a NING website. Here is the triple moon design. It is only about three inches long.

I used Transfer-eze to transfer the small triple moon design onto orange printed fabric. That turned out nicely. I think I'll frame it! :) That was also part of the Fall/Halloween art challenge on Creative Souls, a NING website. Here is the triple moon design. It is only about three inches long.

Transfer-eze! I love this stuff!
First thing I printed out some Urban Threads designs and cut them out and stuck them to another piece of copy paper. Then I scanned those images. Then I printed them out on the rough side of the Transfer-eze with my laser printer which I figured was less likely to bleed (toner rather than ink). I used many images because this stuff is $15 for 10 sheets, plus shipping. Just Google Transfer-eze to find quilt shops to order from. I ordered mine from Original Creations, in Texas, fast shipping.
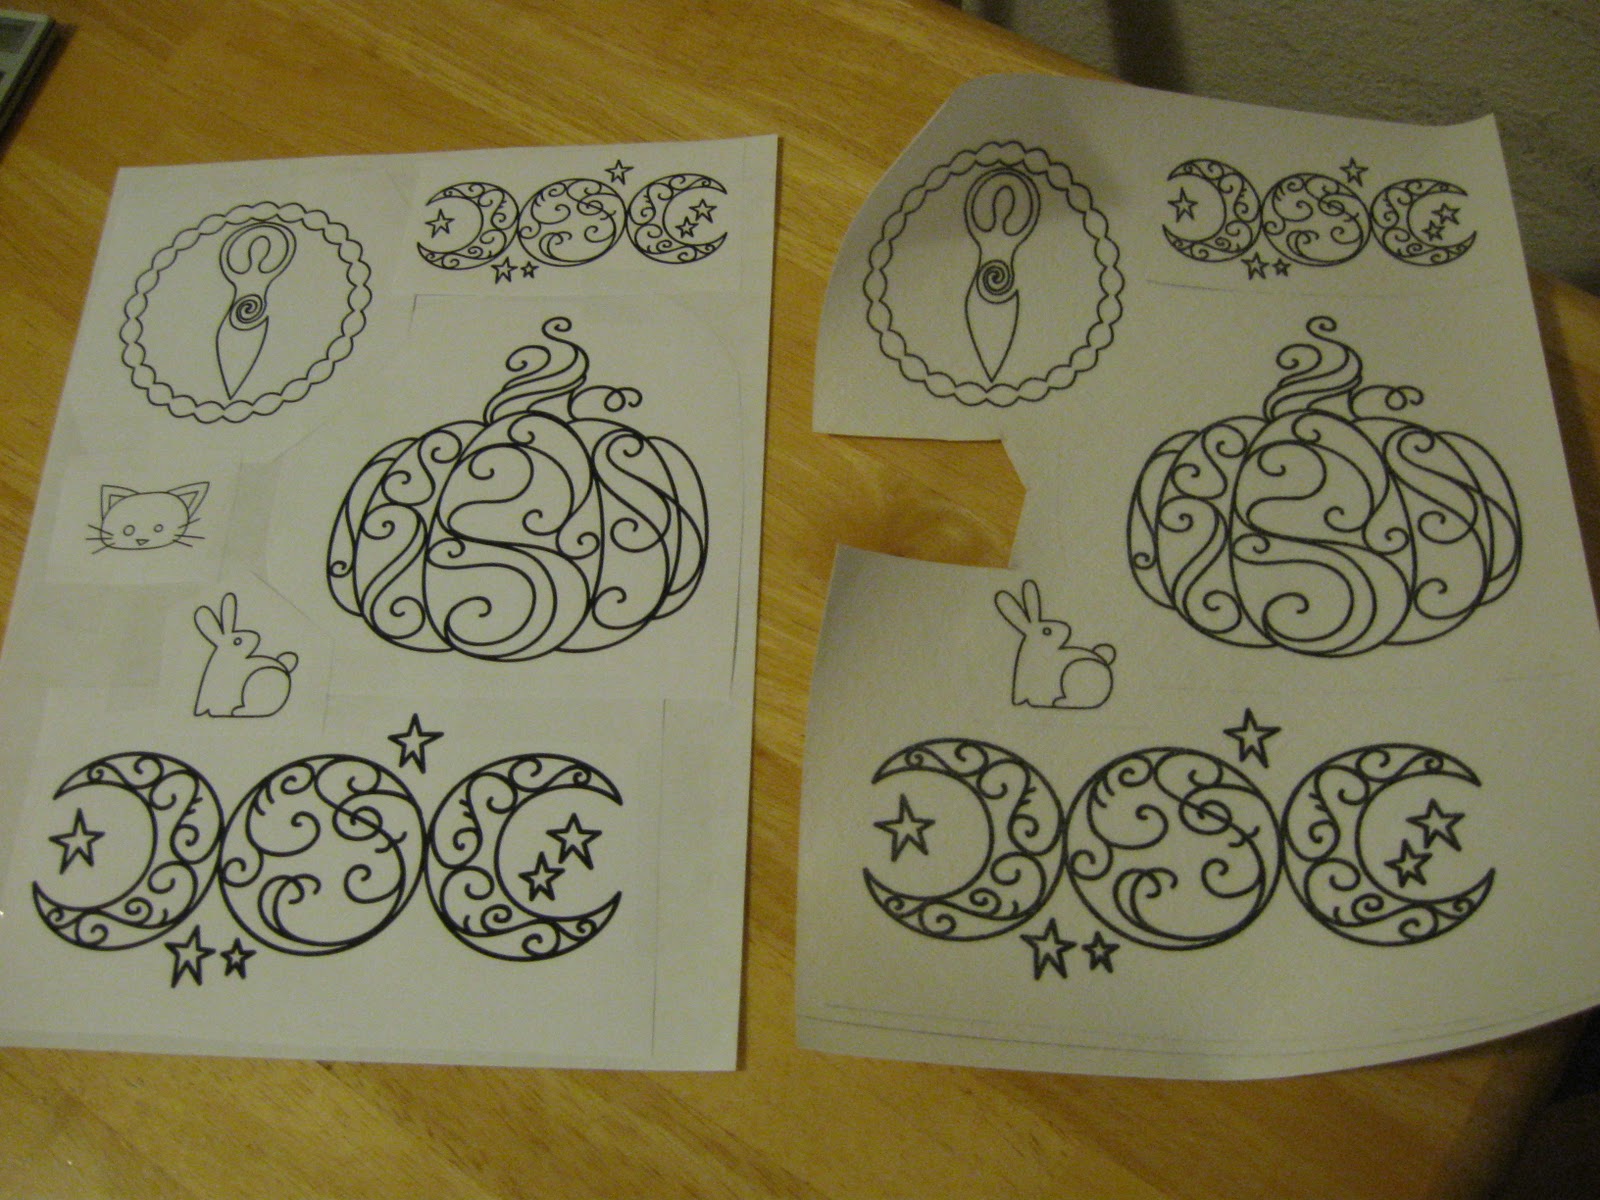
Here's a picture of the cut-out's on the left and the Transfer-eze on the right. I paid for all these designs at Urban Threads, they are $1 each for hand embroidery designs unless there's a sale. They are PDF files.
 As you can see I already cut out the kitty face design. Then you peel the printed side from the blank paper side. The printed side sticks to the surface of the fabric as you can see here:
 Then you just embroider! There is a little sticky filminess, but that is nothing compared to being able to transfer designs onto any color fabric. Here is the kitty embroidered. I chose gray which doesn't show up ver well.
 Then you soak the fabric in cold water for 15 minutes to a half an hour. Still experimenting with the time frame.
 Then I let it the fabric dry overnight. This is the result, a gray kitty face on my jean jacket:
 So easy!
Here's a picture of the cut-out's on the left and the Transfer-eze on the right. I paid for all these designs at Urban Threads, they are $1 each for hand embroidery designs unless there's a sale. They are PDF files.


Thursday, July 29, 2010
Don't try this at home!
I have images on the computer I'd love to transfer and then embroider. I'm looking for easy ways to do that.
I've been neglecting my dishes, so instead of doing those I tried out a couple transfer methods tonight. One didn't work at all and the other didn't work very well. The first was the Acetone Toner Transfer Method. I reversed an Urban Threads image by scanning it, a lucky clover one and printed it out with my laser printer. Then I taped it to a 100% cotton floursack towel. Then your supposed to get a cotton ball wet with nail polish remover and go over it, followed by the back of a spoon. (for complete instructions send me a message with your email and I'll send it to you). Well, this didn't work at all! My nail polish remover says it has acetone in it, but maybe not enough.
The second method I used was the light box transfer method. I found a clear plastic box, turned it on its side and put a floor lamp sideways on the floor into the box, sans shade. I don't have a table lamp. Then I put down my image, not reversed, and traced it with Crayola fine point washable markers on the floursack towel. Well, the markers bled quite a bit. (fabric on top of paper on top of clear box) I should have taped everything down too. I didn't like how it turned out so its on top of the washer. I will see if the colors really do wash out!
So now I'm pretty frustrated. I really want to try Transfer-Eze, when I have a spare $15 or so. Here is the link to the tutorial: http://zuill.us/andreablog/2010/01/29/transfer-eze-a-new-product-for-embroiderers/ Here is a place you can buy it: http://www.originalcreationsquiltshop.com/shop/TransferEze.htm
So for now I'm sticking to iron-on transfers. :(
Does anyone know any other methods that work for you?
I've been neglecting my dishes, so instead of doing those I tried out a couple transfer methods tonight. One didn't work at all and the other didn't work very well. The first was the Acetone Toner Transfer Method. I reversed an Urban Threads image by scanning it, a lucky clover one and printed it out with my laser printer. Then I taped it to a 100% cotton floursack towel. Then your supposed to get a cotton ball wet with nail polish remover and go over it, followed by the back of a spoon. (for complete instructions send me a message with your email and I'll send it to you). Well, this didn't work at all! My nail polish remover says it has acetone in it, but maybe not enough.
The second method I used was the light box transfer method. I found a clear plastic box, turned it on its side and put a floor lamp sideways on the floor into the box, sans shade. I don't have a table lamp. Then I put down my image, not reversed, and traced it with Crayola fine point washable markers on the floursack towel. Well, the markers bled quite a bit. (fabric on top of paper on top of clear box) I should have taped everything down too. I didn't like how it turned out so its on top of the washer. I will see if the colors really do wash out!
So now I'm pretty frustrated. I really want to try Transfer-Eze, when I have a spare $15 or so. Here is the link to the tutorial: http://zuill.us/andreablog/2010/01/29/transfer-eze-a-new-product-for-embroiderers/ Here is a place you can buy it: http://www.originalcreationsquiltshop.com/shop/TransferEze.htm
So for now I'm sticking to iron-on transfers. :(
Does anyone know any other methods that work for you?
Subscribe to:
Posts (Atom)